In this post, I will describe some of the common tools that we use in maintaining, restoring, and rebuilding our ecosystems.
There are many things that could be considered ‘tools’, including some processes like fire and grazing, but here I will focus mostly on those in the category that might be called ‘smaller equipment’. I will spend the most time talking about things that I find to be the most practical, with a few mentions of additional things that practitioners also commonly use. Everyone tends to develop their own ‘kit’ or strategy that works well for them, so it is worth experimenting a bit to see what might work best for you.
As a contractor, I sometimes find myself in the position of needing to prioritize economics and efficiency over other considerations. Some people will have additional priorities that include ‘organic-only’ methods, or that prioritize the avoidance of fossil-fuel based gas engines. These varying preferences all have their place, and I believe they all contribute to a healthy heterogeneity within the world of restoration practice. They also drive innovation, and sometimes help us to develop what will become the most economical and efficient practices of the future.
Human-powered hand tools are excellent for easy light work. Power tools driven both by internal combustion engines AND battery powered tools are quite practical. I also continue to use herbicides (with some reservations), though I will not attempt to address herbicide use in great detail within this post because it deserves a post dedicated specifically to the subject.
Saws and Loppers
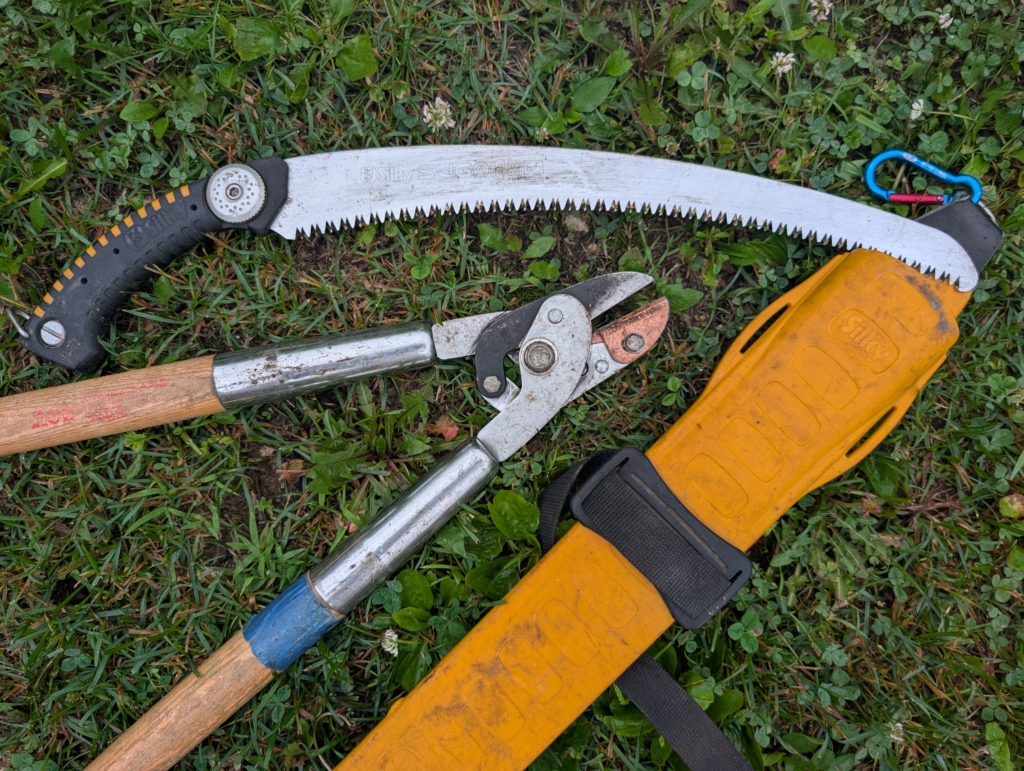
Focusing on brush removal may be a good place to start. Buckthorn and Bittersweet removal seems to be a common point-of-entry for many people in our area. On a smaller scale project it can be quite pleasant to simply use a good pair of loppers or a nice hand saw for clearing woody vegetation up to maybe one inch in diameter. Like most tools you tend to ‘get what you pay for’, so I would recommend doing a bit of research first before just grabbing something cheap. It’s not the only good brand out there, but I’m a big fan of the Japanese Silky brand saw for quiet, light work in the woods. Just don’t slice yourself with one, they’re sharp! Compound ‘anvil’ type loppers still tend to be my favorite larger pruner type. For me they get pinched less than the ‘bypass’ loppers. Saws and loppers have a lot of functional overlap, and experience will guide your own preferences for their use.
A quick practical note about cutting brush (before you rush out and get to work): I would urge you to delay any thought of cutting until you have a sprayer and some herbicide on hand! Anyone who has experience in this work will tell you that they started out NOT treating their stumps, and that when the plants subsequently resprouted into multi-stemmed bushes, they were forced to deal with a monster far more troublesome than when they had begun. That leads us to our next tool…
![]()
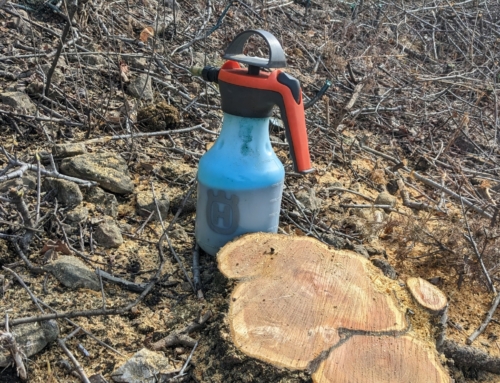
The Bottle Sprayer
A quick and simple treatment using the right herbicide on a freshly cut stump will often save a ton of additional future hassle. Cutting without herbicide treatment simply stimulates a plant to draw upon its stored energy reserves and explode into emergency growth. This vigorous growth is often paired with added defensive measures such as a greater presence of thorns or spines. If you don’t already have a swarm of hungry goats on hand you’ll want a sprayer.
There are a few brands of decent sprayers out there, but there are far more cheap, worthless ones. You need to find the ones that are chemical resistant and, ideally, repairable. I don’t get any kickbacks from Husqvarna, but I’ve settled on their little hand-pump bottle sprayers as my go-to for brush control work. I’ve learned how to correct most of the minor issues they can have, and I typically keep some spare parts around to repair the broken ones. They still don’t last forever, but even with consistent use I can regularly get a few seasons out of them before replacement.
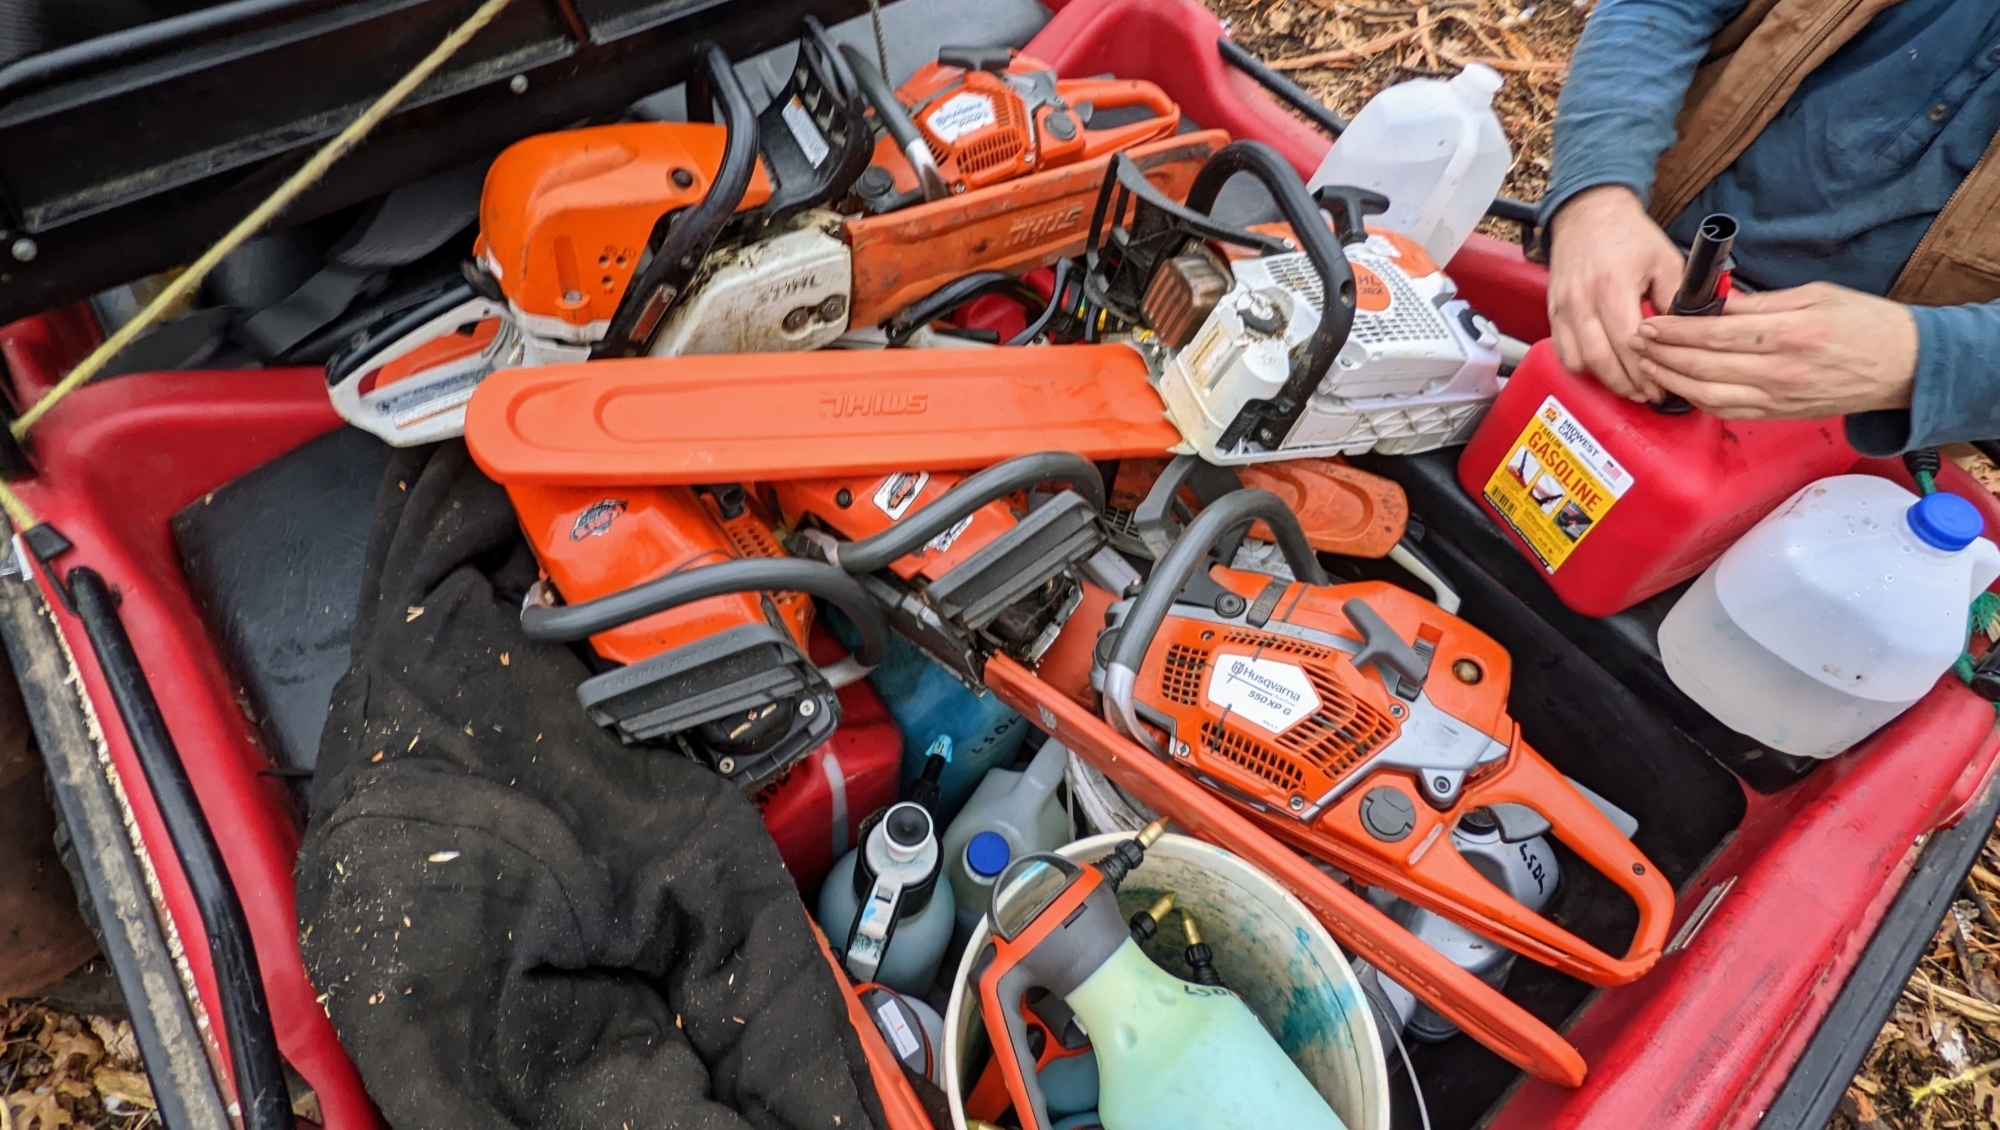
Chainsaws
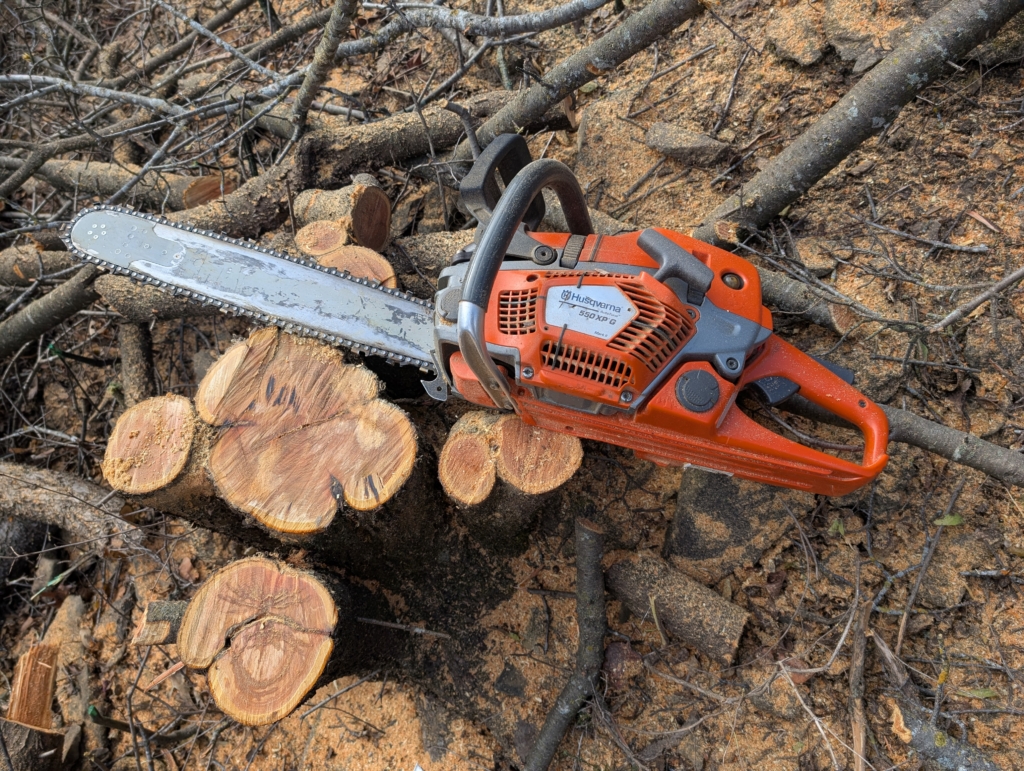
Chainsaws may just be the most useful restoration hand tool out there. I don’t use my Silky hand saw much anymore simply because there are usually some larger diameter issues out there that I want to address while I’m out. With a chainsaw I can quickly clear thick brush, but I can also still mow through a bit of the smaller herbaceous vegetation. I can cut up the larger woody invaders and stack them into tidy piles or disperse and scatter the pieces. At the same time, I can also cut down or girdle some larger lower-quality tree species to open up more canopy and reintroduce sunlight to the site. A Chainsaw often allows me to perform all of the cutting work a space needs in one session, rather than returning with many different types of equipment.
I still find people who think it’s necessary to cheer for a particular brand of saw, but I’d argue that most name-brand saws out there will work just fine. Here again though, it might be the case that you get what you pay for. The more expensive professional saws are now self-tuning, lighter, more powerful, safer, and some even have heated hand grips for winter work. I work through the winter and have hands with poor circulation, so I find the heated grips on my saws to be quite lovely.
Battery-powered electric saws are now really carving out their own niche in the market too. The batteries last quite a long time, they run fairly quiet, and they have pretty impressive torque. I know many people that find that a battery saw is all they need. I have a battery powered Husqvarna saw, and find it quite sufficient for a number of smaller projects. It’s an especially handy saw to toss into the ATV in case I discover a new tree limb down over one of my trails. I think that battery powered saws may eventually take over the market, I just don’t think we’re quite there yet. Knowing the diversity of possible tasks I might need to accomplish on a project I will still choose the gas saw as my weapon of choice. In the event that you’re training in someone totally new to chainsaws, a battery powered one is an excellent beginners tool.
A note about saw size: most of the brush-clearing work that you might do doesn’t need a huge saw. I run an 18” bar on my saw, and I find that to be a good fit for me. A shorter bar would also be sufficient, I just appreciate the slightly longer reach I get with my 18”. You do want to be sure your saw remains somewhat balanced rather than being overly front heavy with a too-long bar. Every so often I’ll have to bring in an even larger saw to deal with something special, but I really don’t enjoy lugging a heavy saw around all day.
I don’t have the space here to go into chainsaw safety or technique, but if you’re new to chainsaws you’ll find plenty of informative videos on YouTube (also many examples of what NOT to do). You may also be able to find some local chainsaw training courses hosted by local conservation organizations. And if you bring a saw out to one of our Restoravore events, you should be able to find someone who would be happy to coach you a bit and provide you with some tips.
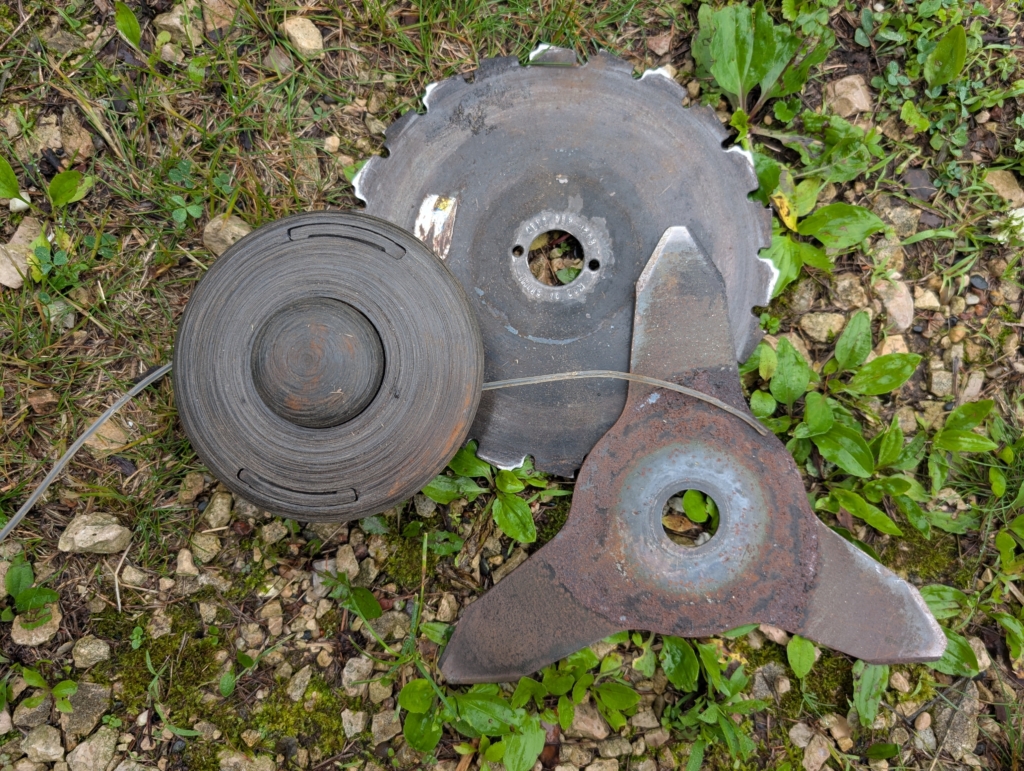
Brush-Cutters
Brush-cutters are basically ‘string-trimmers’ outfitted instead with steel blades or circular saw blades rather than string. There are a number of different blade types available, and they each have their varying strengths in slightly different vegetation types. The round, saw-toothed, blade types are handy for somewhat larger, multi-stemmed, solidly woody shrubs. The type that I usually have on my machines we call the tri-blade. The tri-blade option is a good fit when you are cutting through some taller grasses, some stemmy weeds, and the occasional woody shrub.
I use brush-cutters for building fire breaks and for mowing through tough spaces. They work well for managing brambles, or for knocking down thick vegetation in preparation for herbicide treatments. Battery powered brush-cutters, like the battery saws, can perform many of the required tasks, but not maybe not the heaviest ones. I use my battery machine mostly in just grasses.
As with any tools (especially power-tools), be sure you have (and use) the proper personal protective equipment (PPE)!
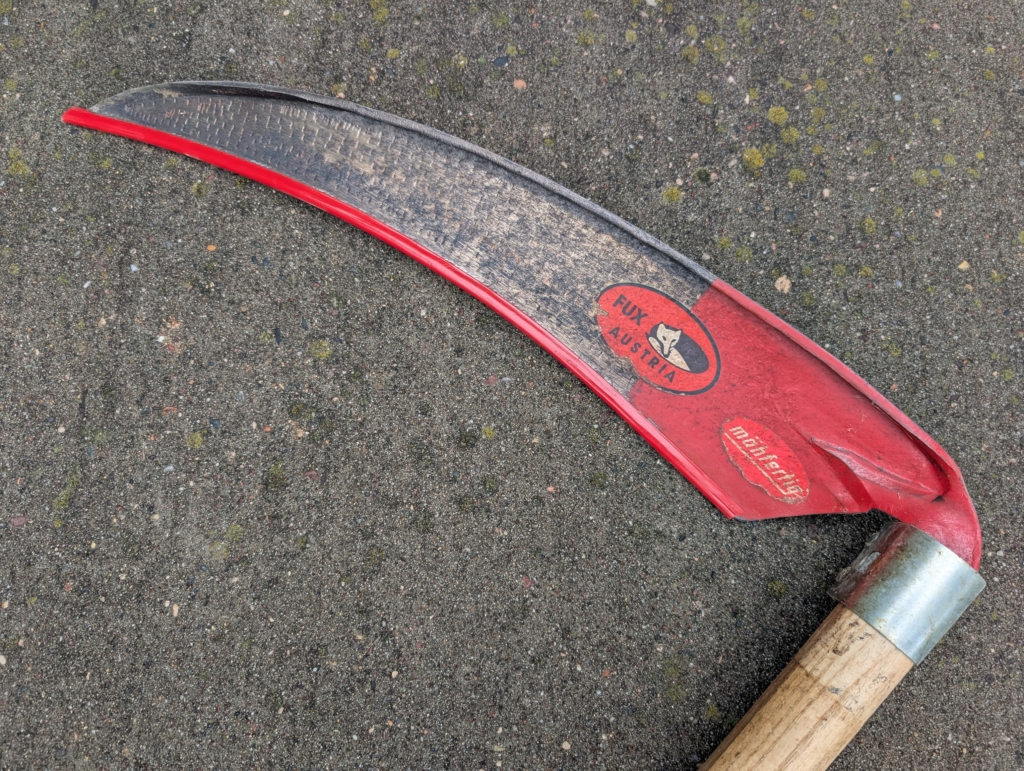
Scythes
A high quality scythe blade, on a lightweight ‘snath’ (handle) made to your own body dimensions can be a pleasure to use. We are fortunate in my neighborhood to have a local scythe builder just a few minutes away. There are certainly times at home when I prefer to swap my noisy brush-cutter and PPE for a quiet, more enjoyable (even aesthetic) work experience. That said, if there are more than a few woody plants hiding in my mowing project, the scythe effectiveness becomes more limited. Using a scythe can be a bit of pleasant therapy.
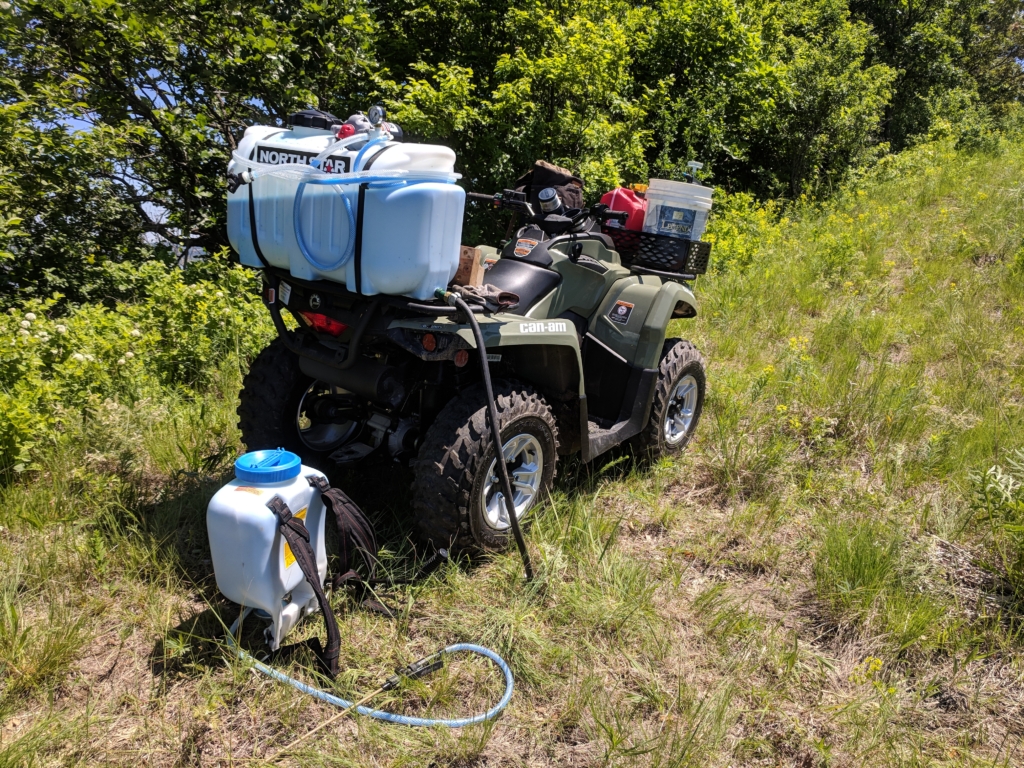
Backpack Sprayers
Again in the herbicide department (which I’ll touch on more in another post): a good backpack sprayer (one that doesn’t leak all over you) can be really useful. When I’m cruising through a large project doing follow-up control spraying on resprouting or newly germinating weeds, a backpack sprayer is just the right tool. Always protect yourself from spray drift, and definitely avoid spraying upward into the air. Minimize your herbicide use and personal exposure as much as you can.
On a side note– I’m waiting for a battery powered backpack sprayer to impress me enough for me to upgrade from my manual hand-pump packs. If you find one you are impressed with, let me know. I’d especially love to find one that uses the same batteries as some of my other electric tools, but the reviews I have seen to date have been less than stellar.
Weed Wrenches
Weed wrenches are long handled tools that grip on to the bottoms of woody stems and are used to lever whole root systems out of the ground. I have seen these used effectively, but typically find them to disturb the soil in a way that I find more concerning than my usual use of herbicide. If a site is going to be cleared by volunteers who don’t have saw experience, finding one of these might be appropriate.
Plastic and/or Smothering
I’ll address this here because many people use plastic along with with cutting as an alternative to herbicide. Here again, heterogeneity within practice is probably beneficial, although I personally don’t prefer this technique.
After cutting, it is possible to wrap or cover a stump with plastic and to then bind it tightly. This technique is used to smother any regrowth that might follow. Similarly, sheets of plastic can be spread over the ground and used to kill off short herbaceous vegetation before a site is seeded or planted. I tend to avoid the use of plastic in this way because I find it to be an inefficient use of my time and generally less effective. And although it is sometimes possible to use recycled plastics, these techniques still often also produce a lot of unnecessary waste. Solar radiation degrades some plastics relatively quickly in exposed applications, and I wonder what effect the residual microplastics might have in an ecosystem, but ‘to each their own’.
I’ll again reiterate that I think it’s appropriate to do quite a bit of experimentation using a variety of tools. It might be handy to borrow tools from a friend and see what works well for you. The tools you begin your work with may not be the ones that you prefer to use later on as you gain experience. Your scope of work, your physical ability, your budget limitations, and your restoration philosophy will all play a role in these decisions. There are many more tools that could have been mentioned in this piece. Their absence doesn’t mean that they aren’t appropriate or useful. I am simply sharing the ones I tend to find the most appropriate in my local context.
In the next post, I’ll explain some of the larger types of equipment we commonly use in our landscape projects. This series of posts can be found in the ‘Resources’ page of our website.


Leave A Comment